With the rising popularity of the internet and social media sharing platforms: it’s only natural for some trends to become popular, almost overnight. For example, the selfie. To people who not know what a selfie is, Webster dictionary defines it as a photograph that one has taken of oneself, typically one taken with a smartphone or webcam and shared via social media.
Since “selfie-ing” is the next big thing and a lot of people take them, I have seen a lot of train wrecks, and I am here to teach you all of the DO’s and DON’T’s of selfie taking, so you won’t be one of them.
 The first and easiest step to a fantastic selfie is the clothing you decide to wear! Wear something that makes your eyes pop, and something you feel super comfortable and confident in. You might think it’s true but people who will see your selfie will always notice what you’re wearing first! If you don’t know exactly what shirt of pant to wear, think back to what article of clothing you get the most compliments in, wear that!
My second step is a definite key element to not flopping at the art of self-photography, good lighting. You can have the pose and have the clothes, but without the proper lighting, your selfie won’t look as high definition as one with a good source of light would. For example, stand in front of a window during the daytime! Natural lighting is one of the best and softest sources of light, and its like super cheap! Utilize it!
The third step I highly recommend is a cute pose! Top notch lighting cannot save you from a weird awkward stance you might have if you don’t have anything else to do. I recommend studying other successful “selfie-ers” and seeing how they’re holding their hands and the faces they’re making. 
My fourth step can make or break you: the filter. If you’re older you might not know, but the filter is the most important step to a killer selfie. A great filter can easily be obtained by downloading apps like VSCO cam, and Afterlight. However, with great power comes great responsibility. I would not recommend using a filter that is built into the Instagram app. You might not think we can tell, but trust me: we always can. I use VSCO and my go-to filters are always B1 and A6. Not only is VSCO great for filters, it also gives you the option to tweak things, such as the contrast and the temperature of the photo.
Now for the last DO of selfie taking: make sure there aren’t a lot of background distractions! If your selfie is really hectic and cluttered, it is automatically disqualified as a killer selfie. A great alternative to a super busy public place is a bedroom with your favorite wall in the background, or a cool public wall or street that has a killer feel.
Now that you guy’s have learned all of the DO’s to selfie taking, let’s learn a little more about the DONT’s. For example: borders! If you don’t know what I am talking about, I am referring to the little white borders people used to put on the sides of their photos to make the photo fit on Instagram. Don’t use those! Your Instagram feed is important, and white borders seem to disrupt the flow of it all. Instead, make sure to take all of your photos on the “square” setting if you have an iPhone, or if you have Android, crop the photo to a square in either the Photos app, or the Instagram app itself.
My next selfie DON’T is a more obvious one, but never the less still very important: blurriness. If your photo is not very high quality, and not very clear, you automatically have worked
against your cute clothes, cute pose, and cute filter.
The third tip is to not make the infamous duck face. Some people accidentally fall into the inescapable hole of making a duck face in photos, which eventually becomes your go to face and never ends well: I learned the hard way. There are a ton of other faces and poses to make that will work better, and are just as easy.. you just got to experiment with what feels right.
The fourth mistake not to make is: too much FaceTune, (or any other face editing program). I am all for editing out an imperfection or fixing your whacky hair, but it is super easy to go overboard and fix every single flaw you have ever noticed, and look like a totally different person by the end of your editing stint. It’s okay not to be perfect, embrace your flaws, don’t strive to change them.
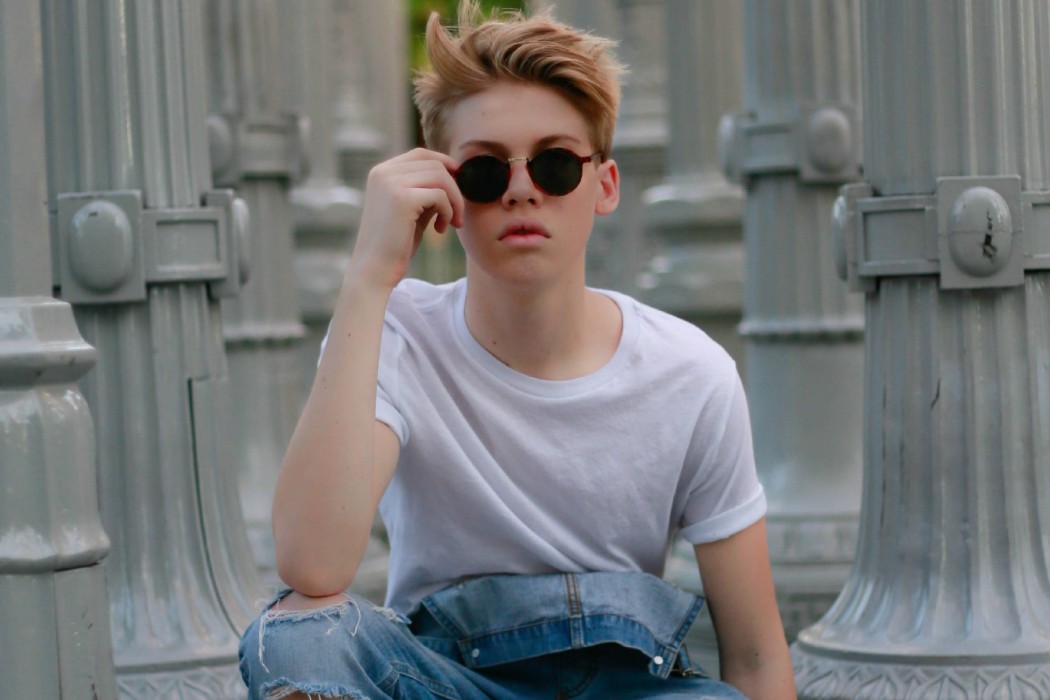
My fifth and final DON’T is the easiest thing to fix: how you wear your sunglasses. Wearing shades in a selfie immediately makes you look cooler, but make sure you position the glasses on your nose to where we can still see your eyebrows, it elongates your face and really helps you look awesome in the selfie.
Overall, my main piece of advice is to take a picture you enjoy and feel comfortable and confident in. At the end of the day, ‘selfie-ing’ is fun and should stay that way. I am Aidan Alexander and I believe in you! If you want to see my selfies: go to my Instagram @aidanalexander, my Twitter: @aidanjalexander, and subscribe to my YouTube, @maadraad.
– AA
~~~
Stay tuned for our interview with Aidan coming soon!
(Photo Cred: Brandon Sapp


Aidan Alexander | Online Articles
[…] Do’s and Dont’s of the Selfie by Aidan Alexander http://teenplicity.com/dos-and-donts-of-the-selfie-by-aidan-alexander/ […]
Do's and Don't of the Selfie by AIdan Alexander - Aidan Alexander
[…] READ THE FULL ARTICLE HERE. […]
Selfie Culture With Aidan Alexander | TEENPLICITY
[…] Read Aidan’s article on the do’s and don’ts on taking a selfie here! […]